Soundair Aviation Services – Flush Button
CASE STUDY
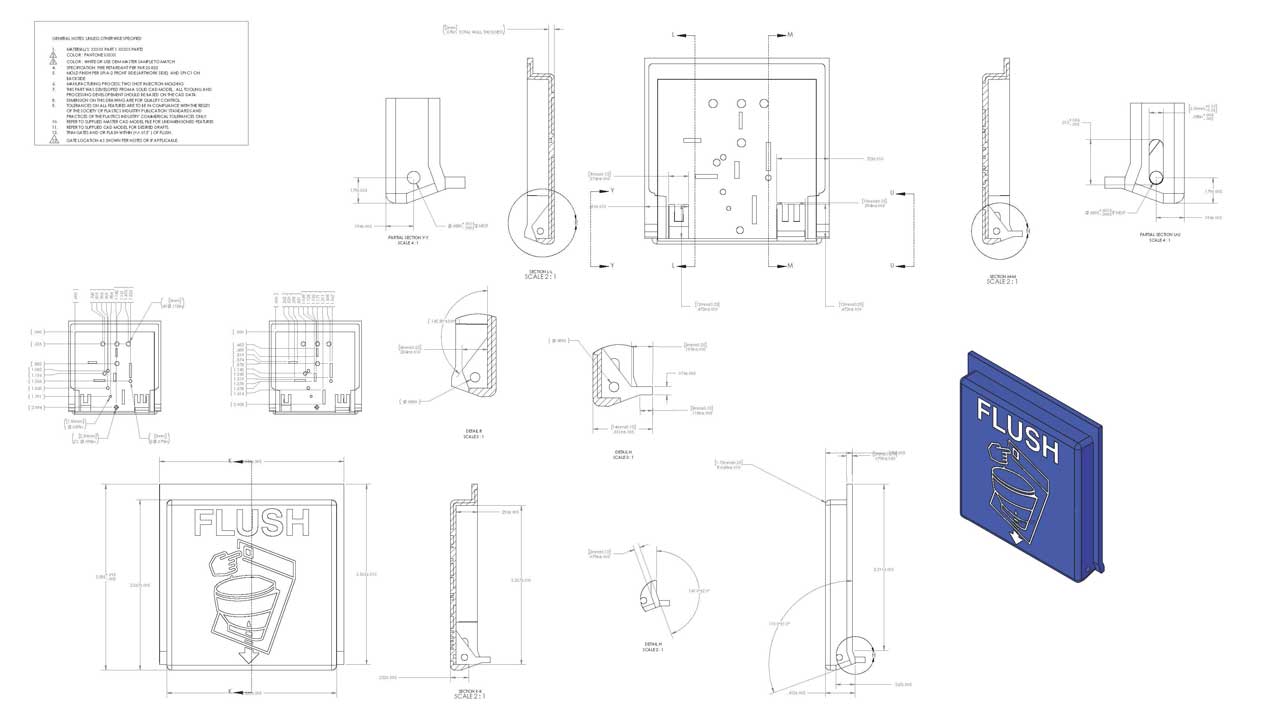
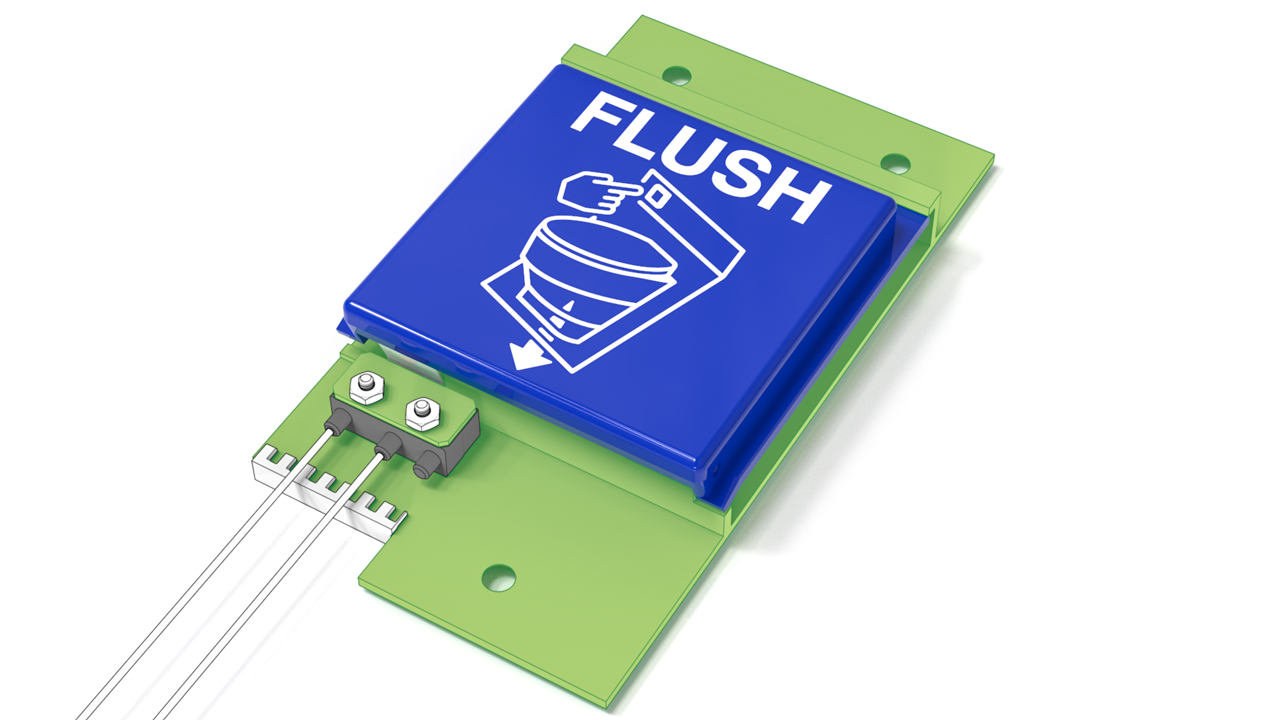
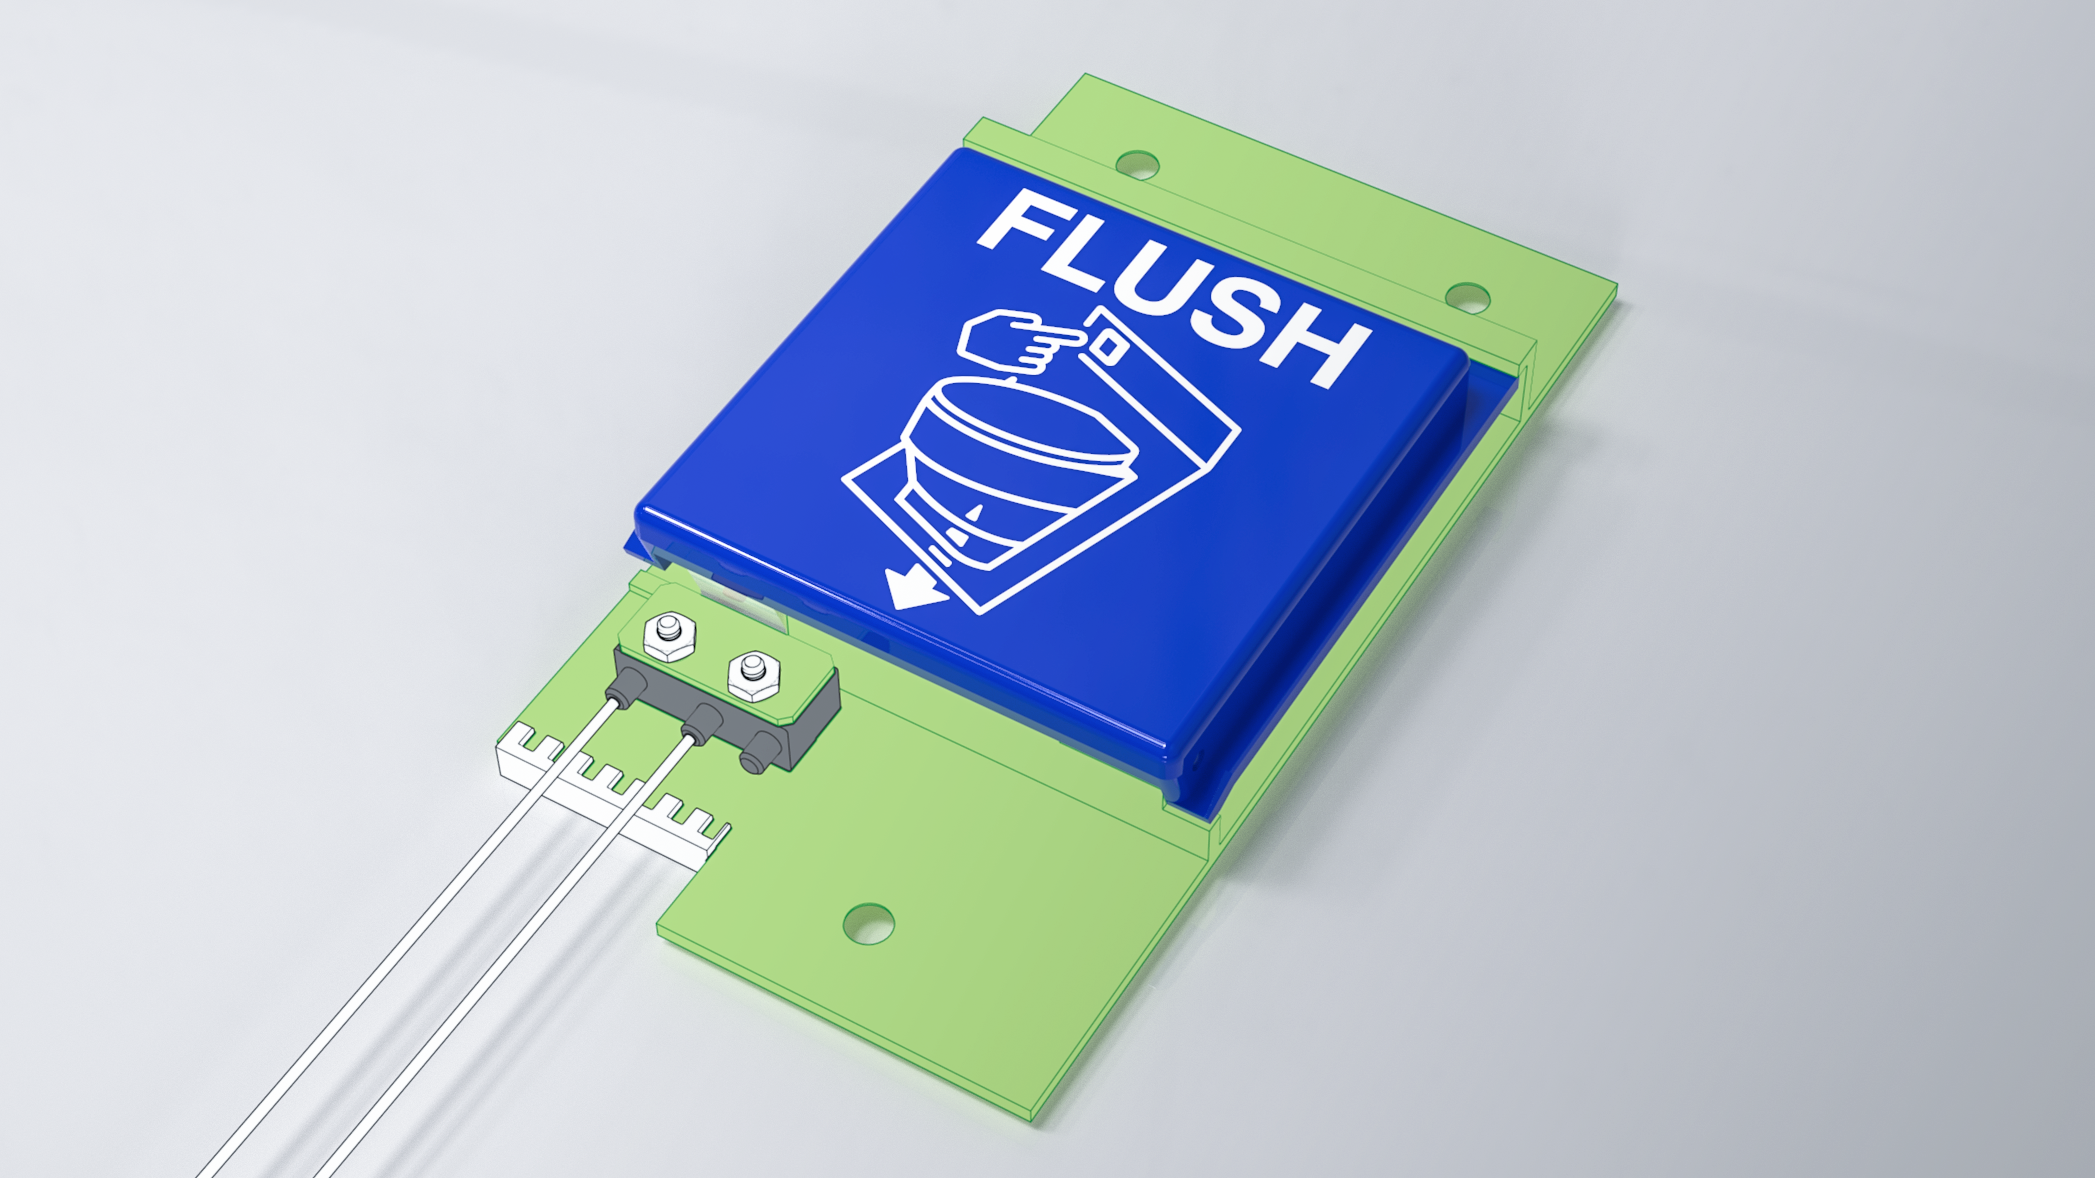
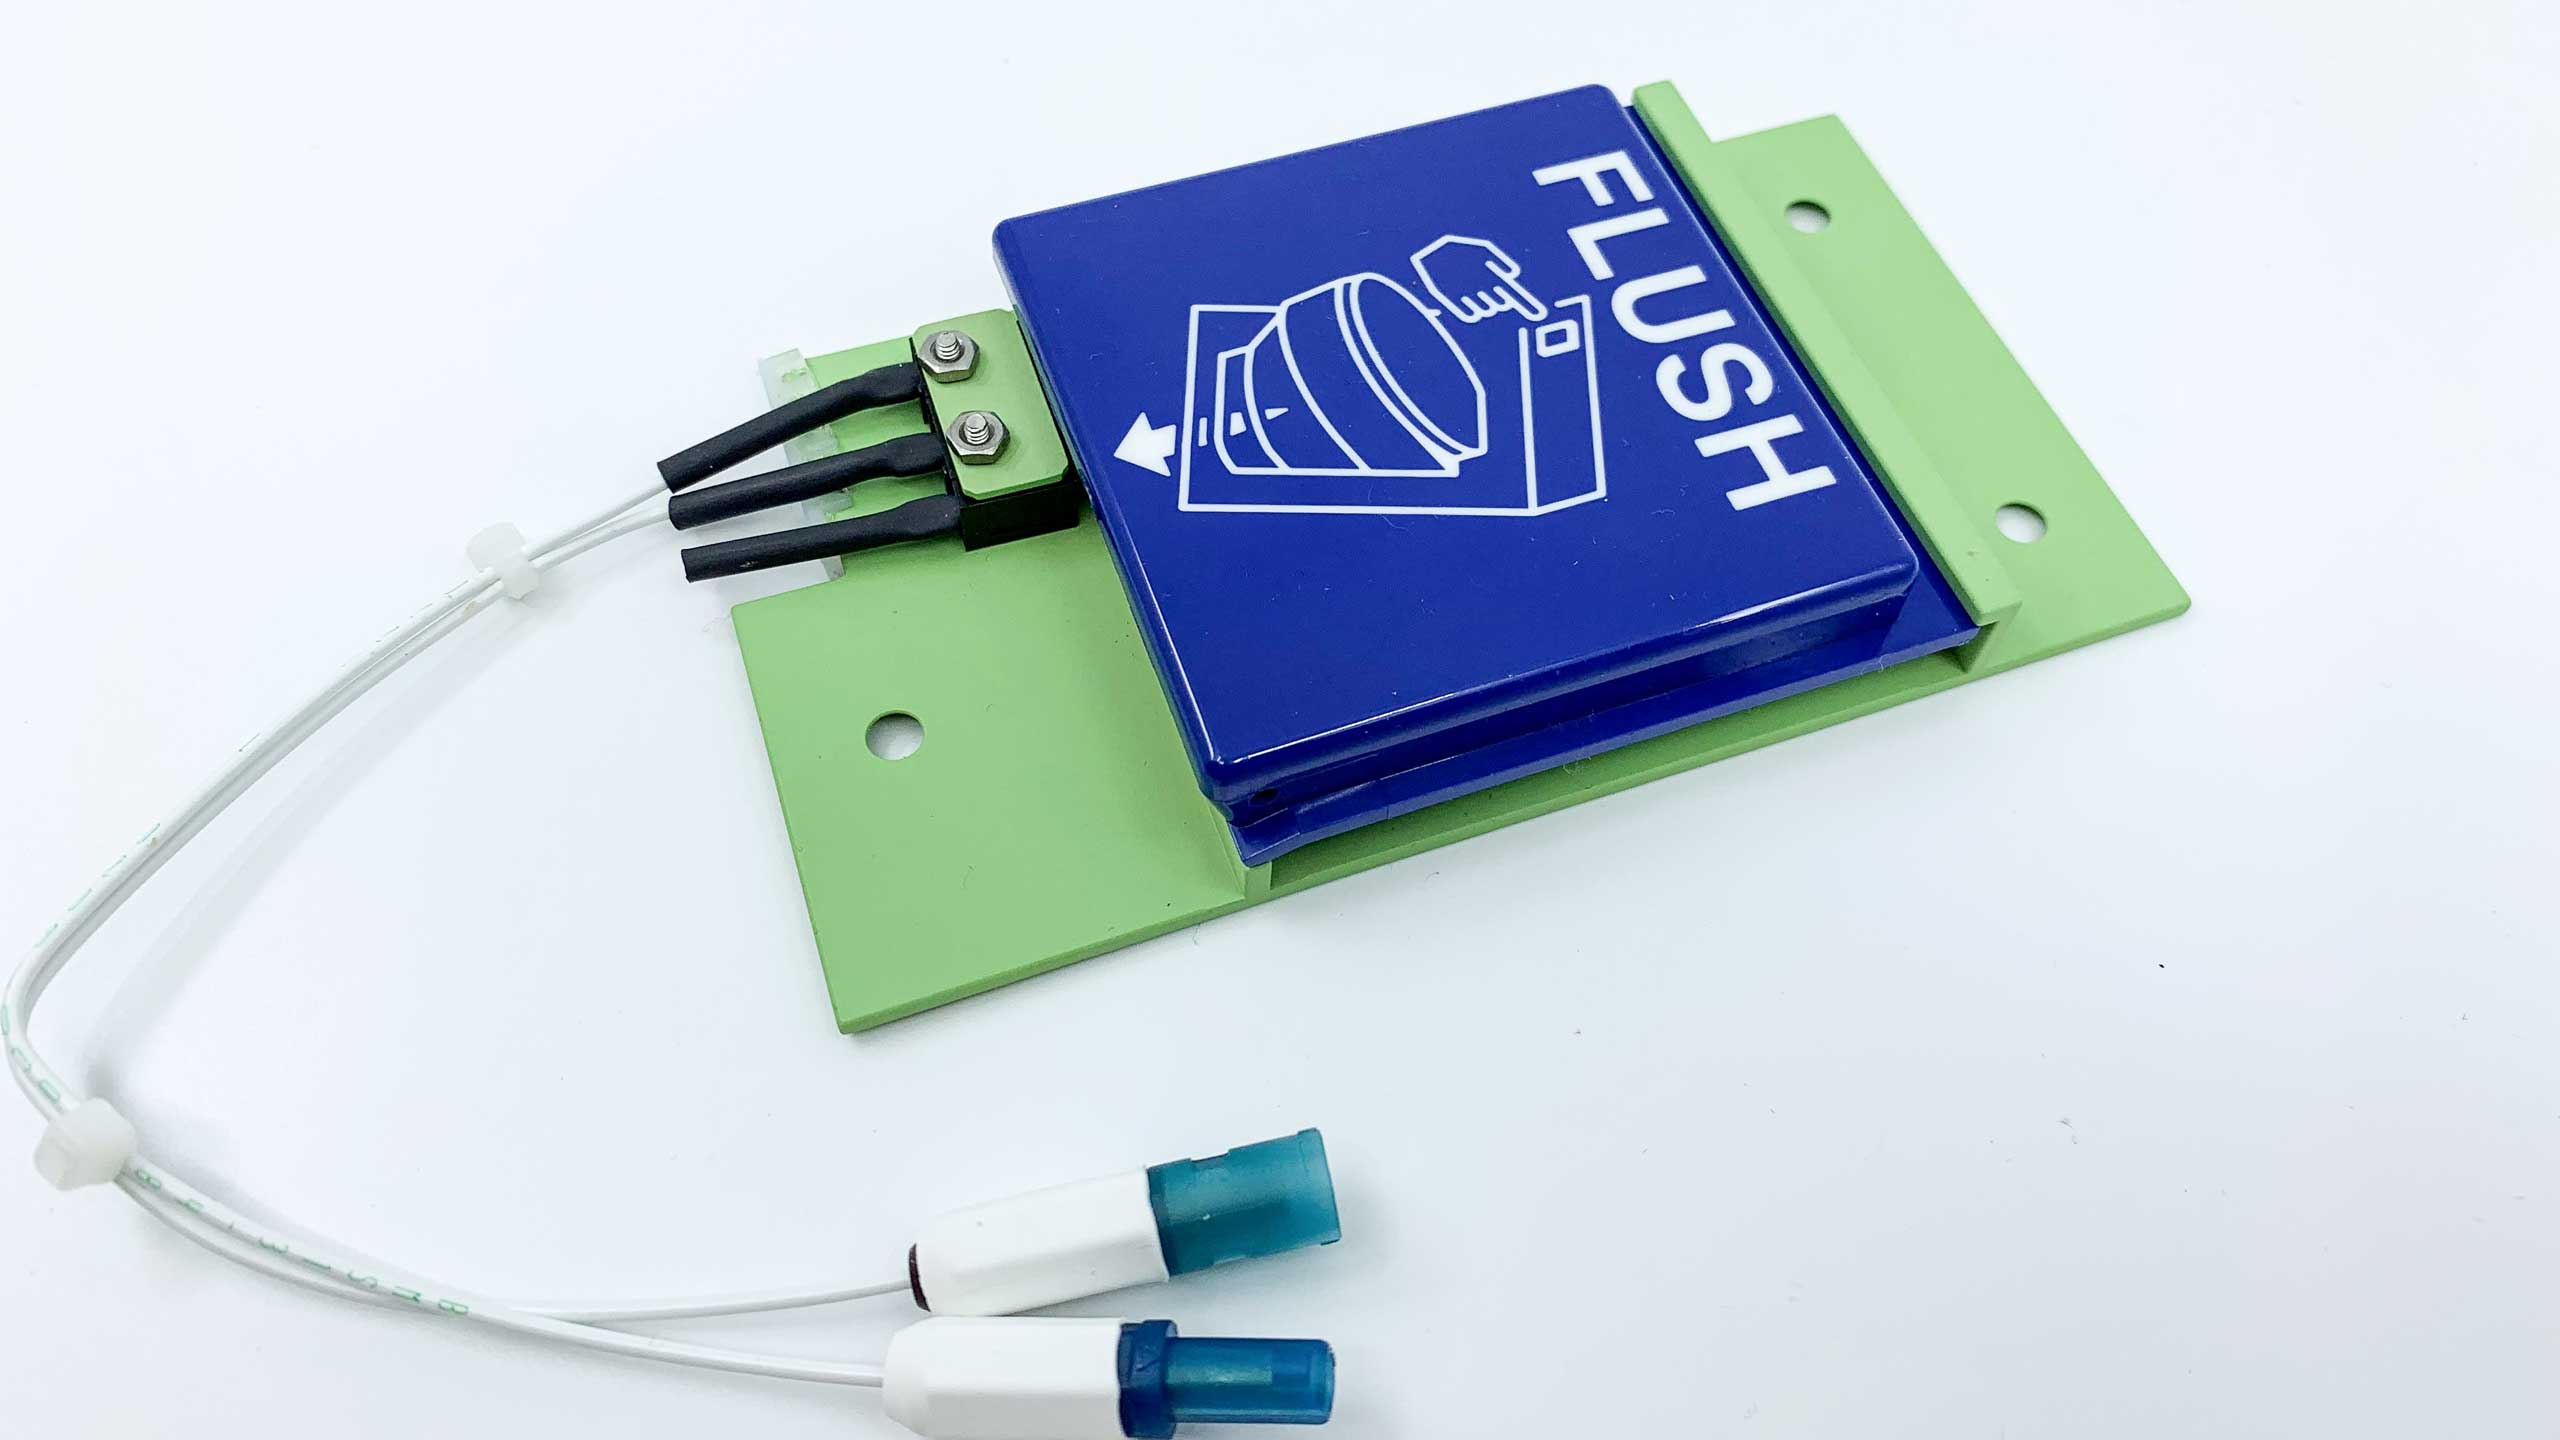
My old manager Barry Fausey, Engineering Manager at Soundair Aviation Services reached out to me for help with reversing engineering a Flush Button. A rather simple looking injected plastic part on the surface however would require a fair amount of detailing the part to be designed for manufacturing, specifically two-shot injection molding. A process that combines two materials in one injection process.
But before I would commit to taking on this project I ask, Why hire someone like me? Can’t you do this in-house with one of your engineers? The response Barry gave me was, “I worked with you before, I know you can get this done right, and we just have too much on our plate right now”. It meant I like you, I trust you, and I’m buying time. We then came up with a budget and deadline that would be fair to him and to me that would make sense for his return on investment. Burgers and beers were had, hands were shaken and so it began.
Key Things to Note
Before I would grab my calipers and jump into SolidWorks to start modeling there were some key things to note about the design intent of the flush button:
- Designed for Two-Shot Injection Molding Process.
- Two types of materials for part 1 (white) and part 2 (blue).
- Originally developed in Japan so most likely that part was design with metric units.
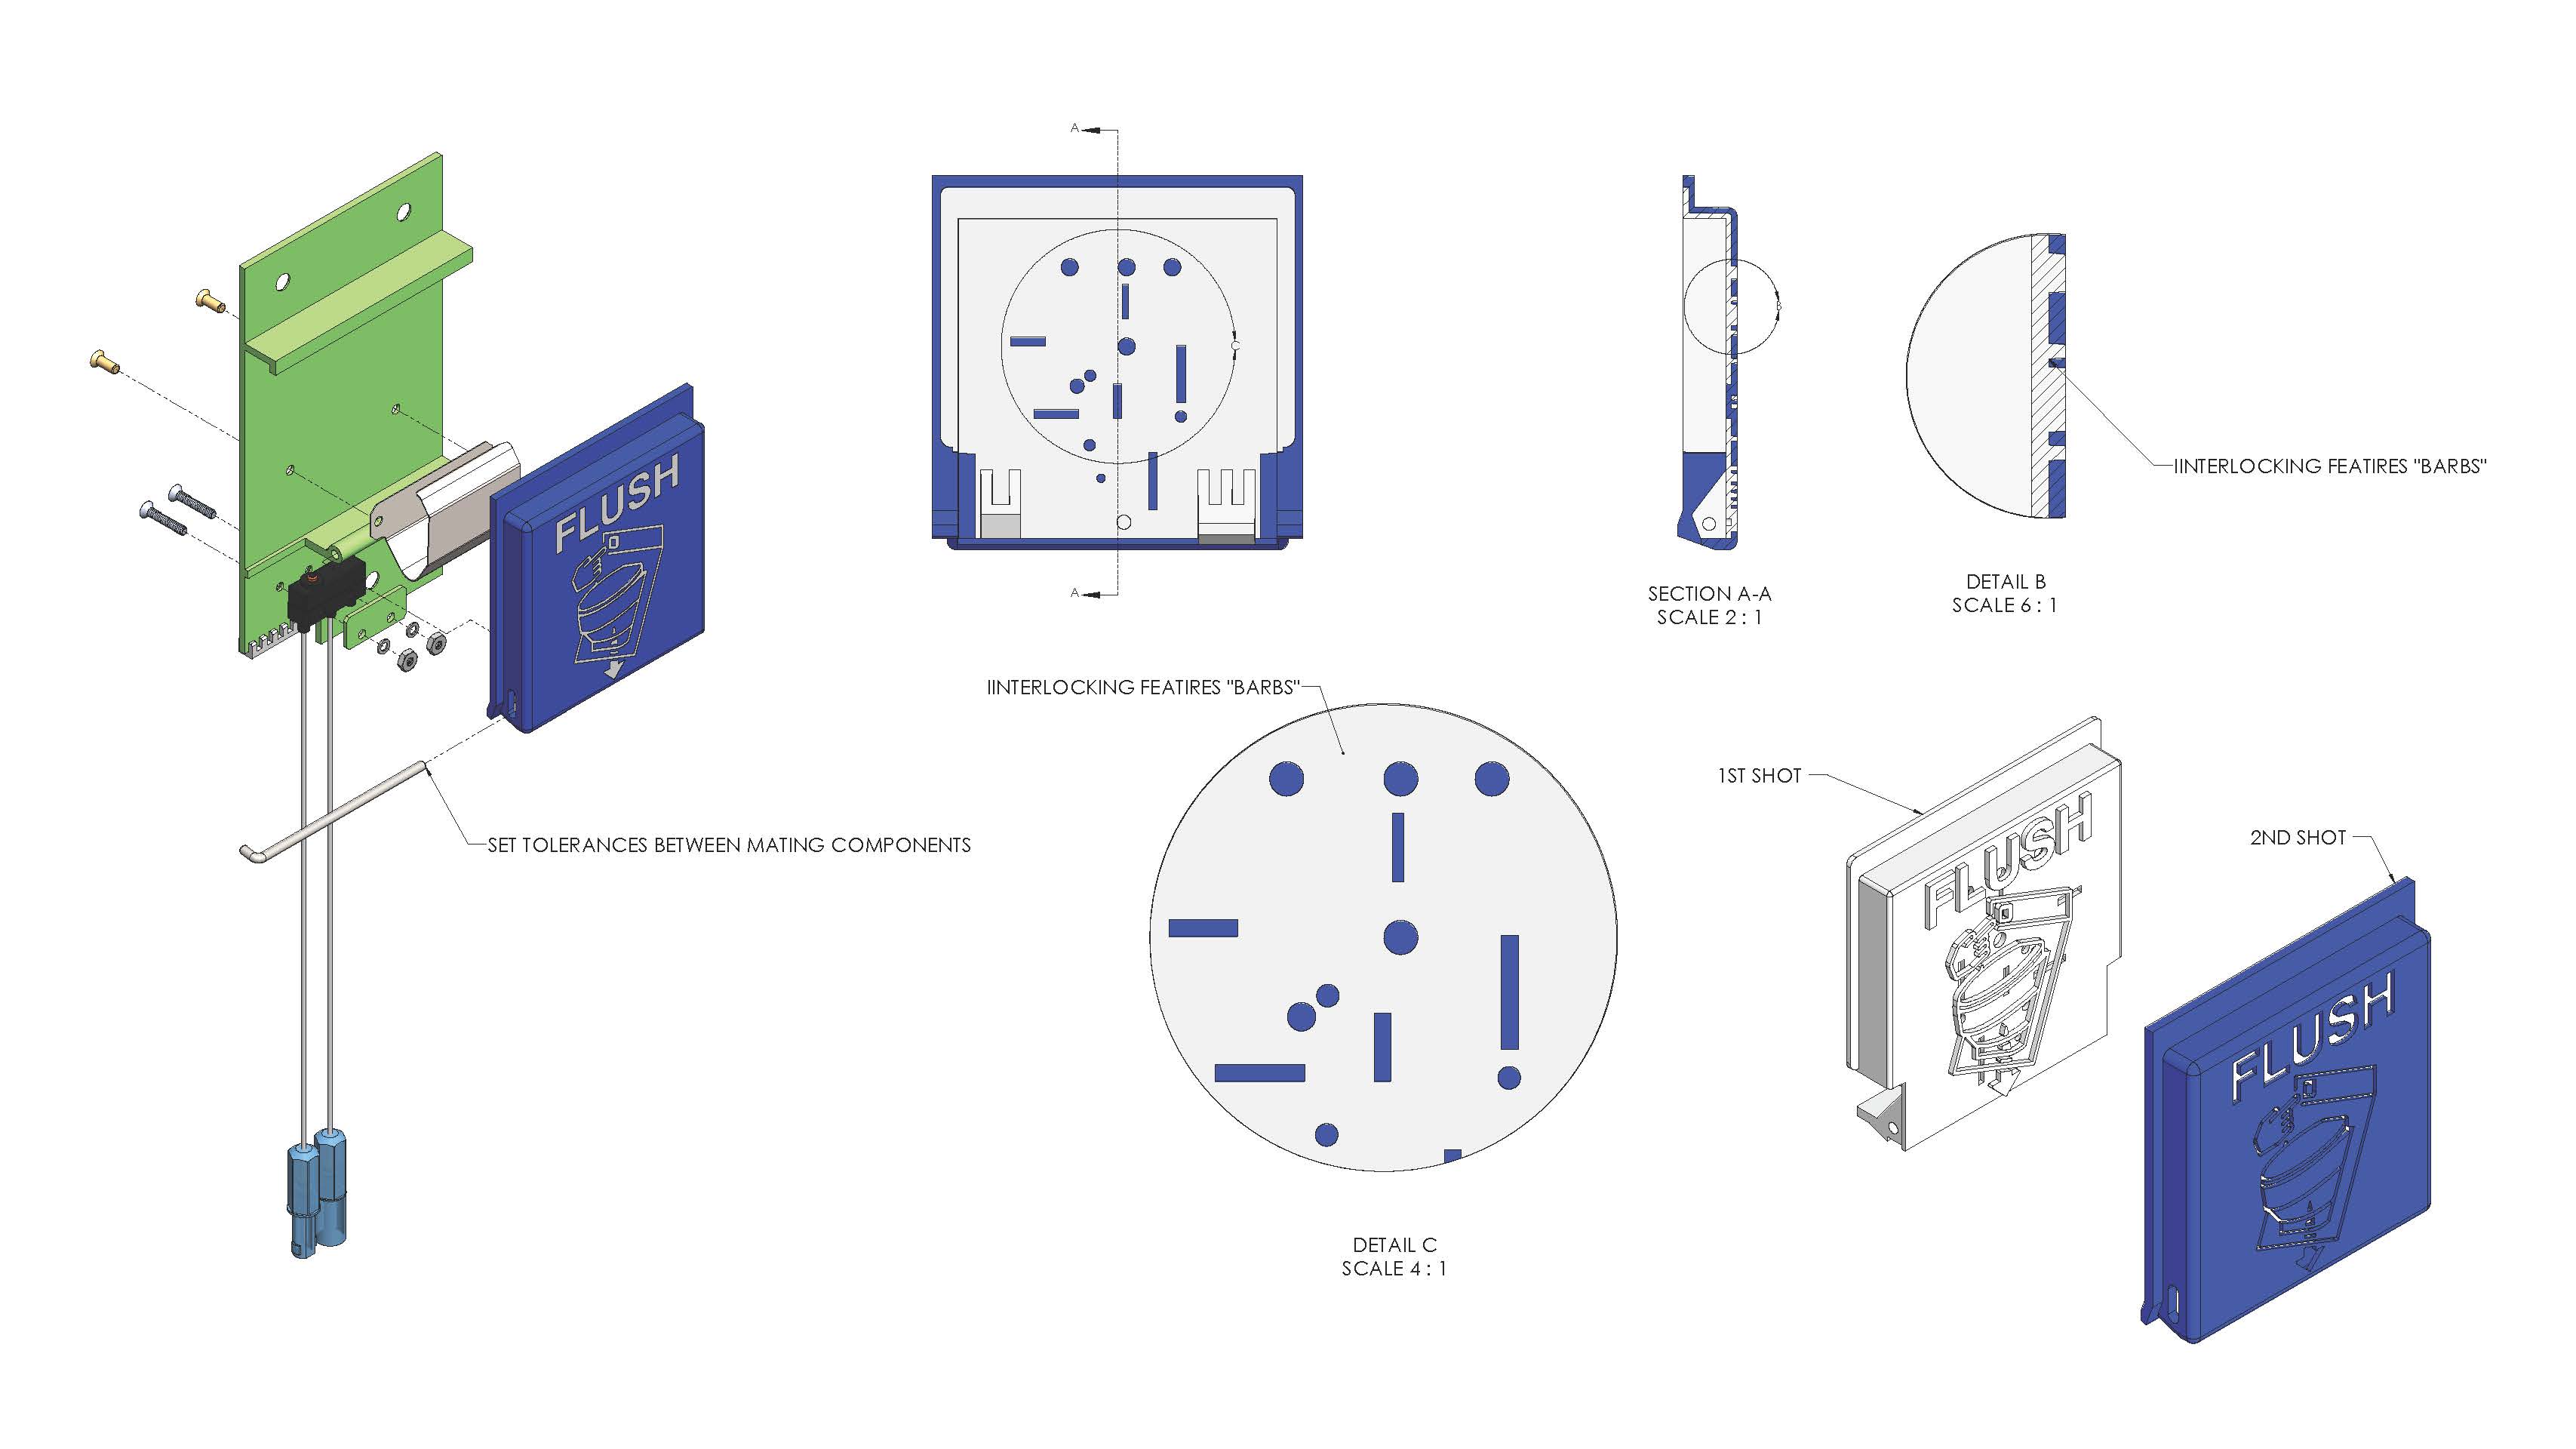
- Special interlocking features that were design into flush button to mechanically bond the two materials together.
- Tolerances between mating components
Two-Shot Injection Molding
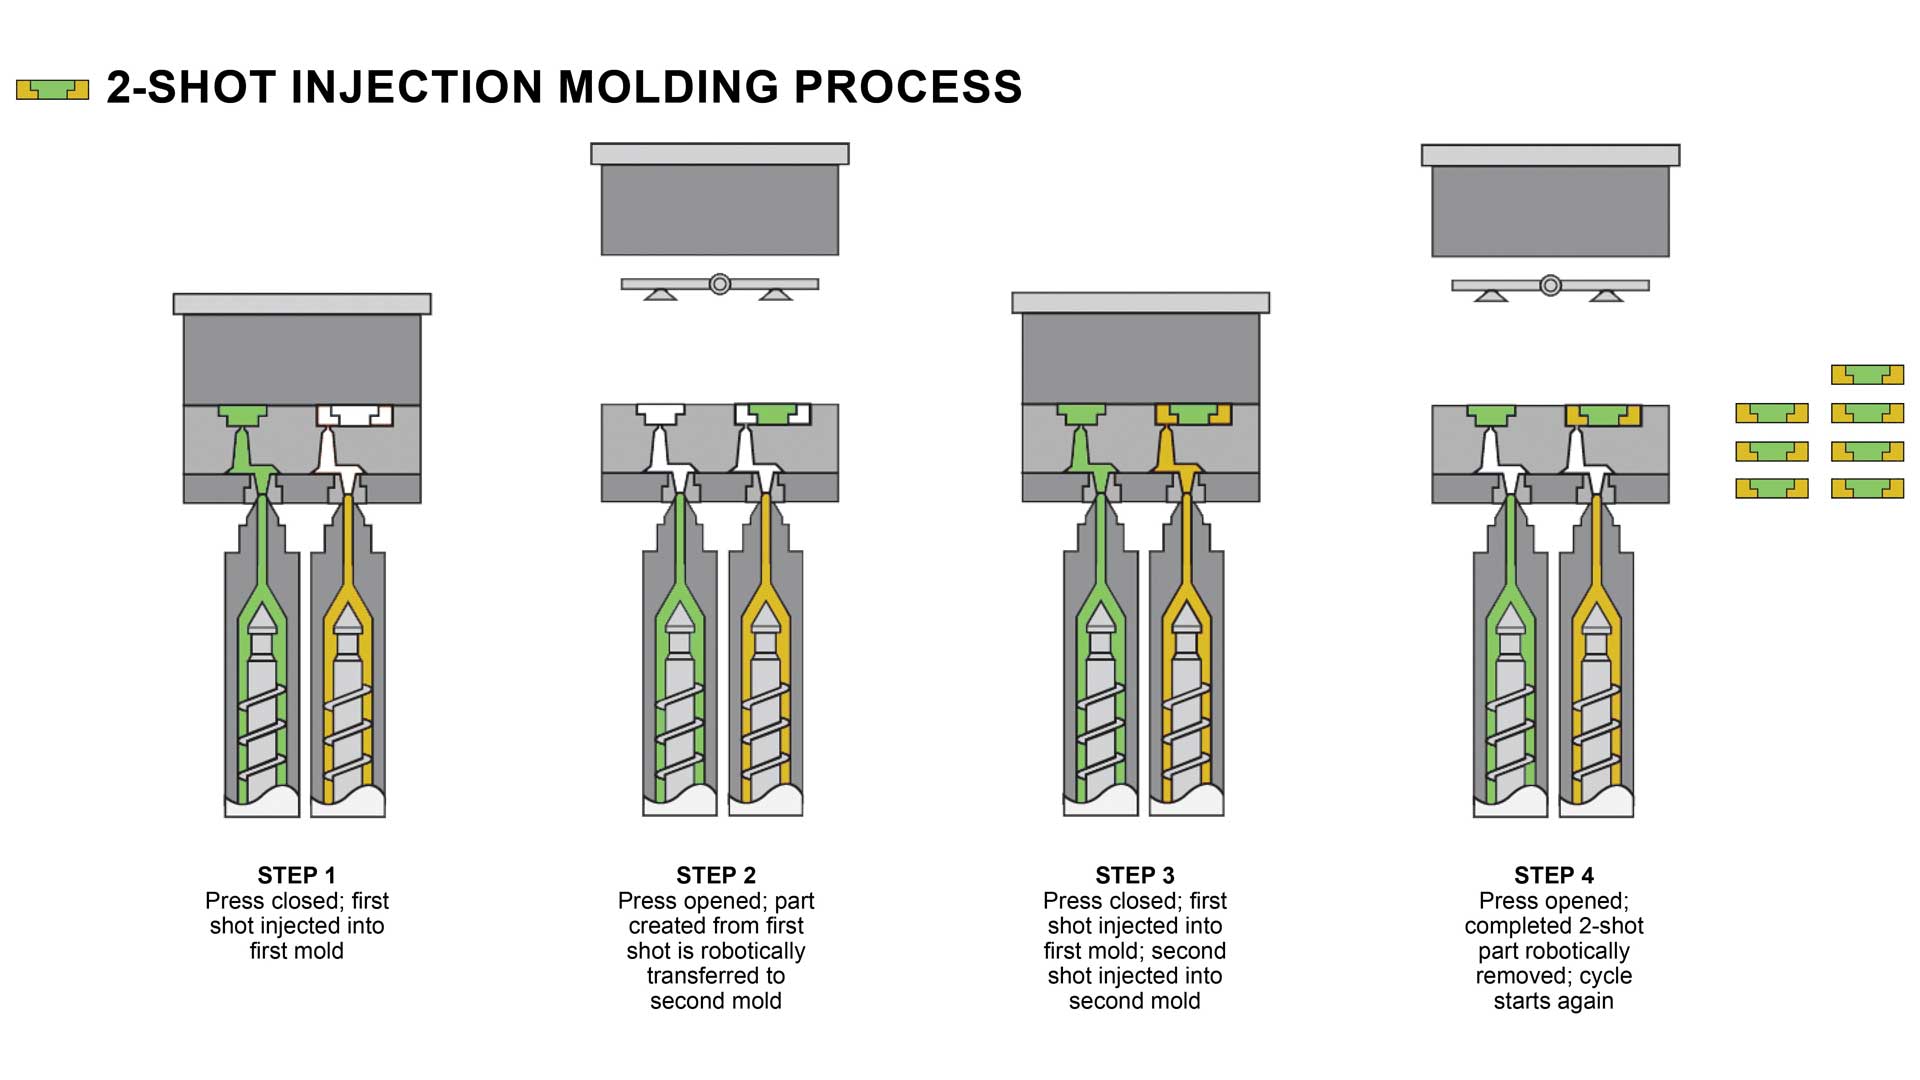
So why was two-shot injection molding use for this part? I believe the main advantage was to eliminate any secondary process when dealing with a multiple color part with artwork. Sure this could be done traditionally with standard mold injection with one color then have a secondary sticker or silkscreen the flush artwork but this would require an additional part or secondary process and I don’t think the durability of those method would hold up as this button is repeatedly press when in use.
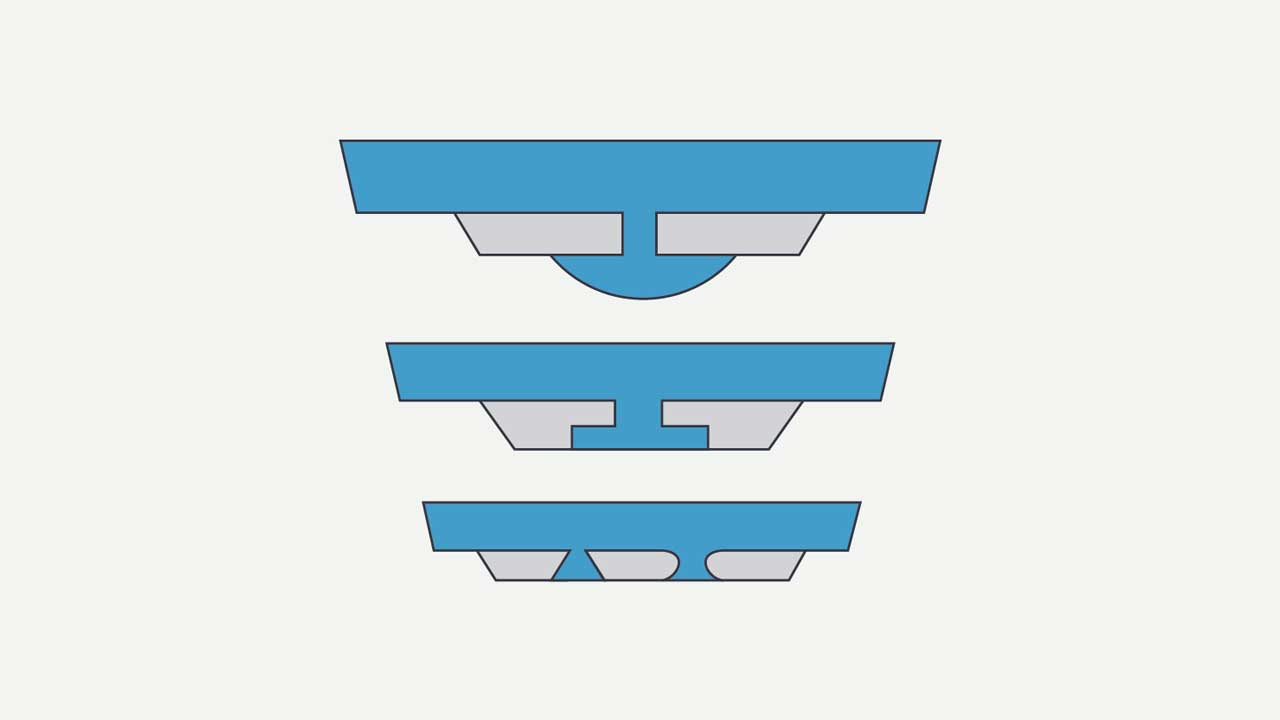
In order to make two shot injection molding work there are some interlocking design features that need to be considered along selecting two different materials that have different melting points in order to successfully mold the part. The interlocking features would increase the bond between the two materials and having different melting material would keep the 1st shot part from melting while the 2nd shot material is molded.
Design for Manufacture
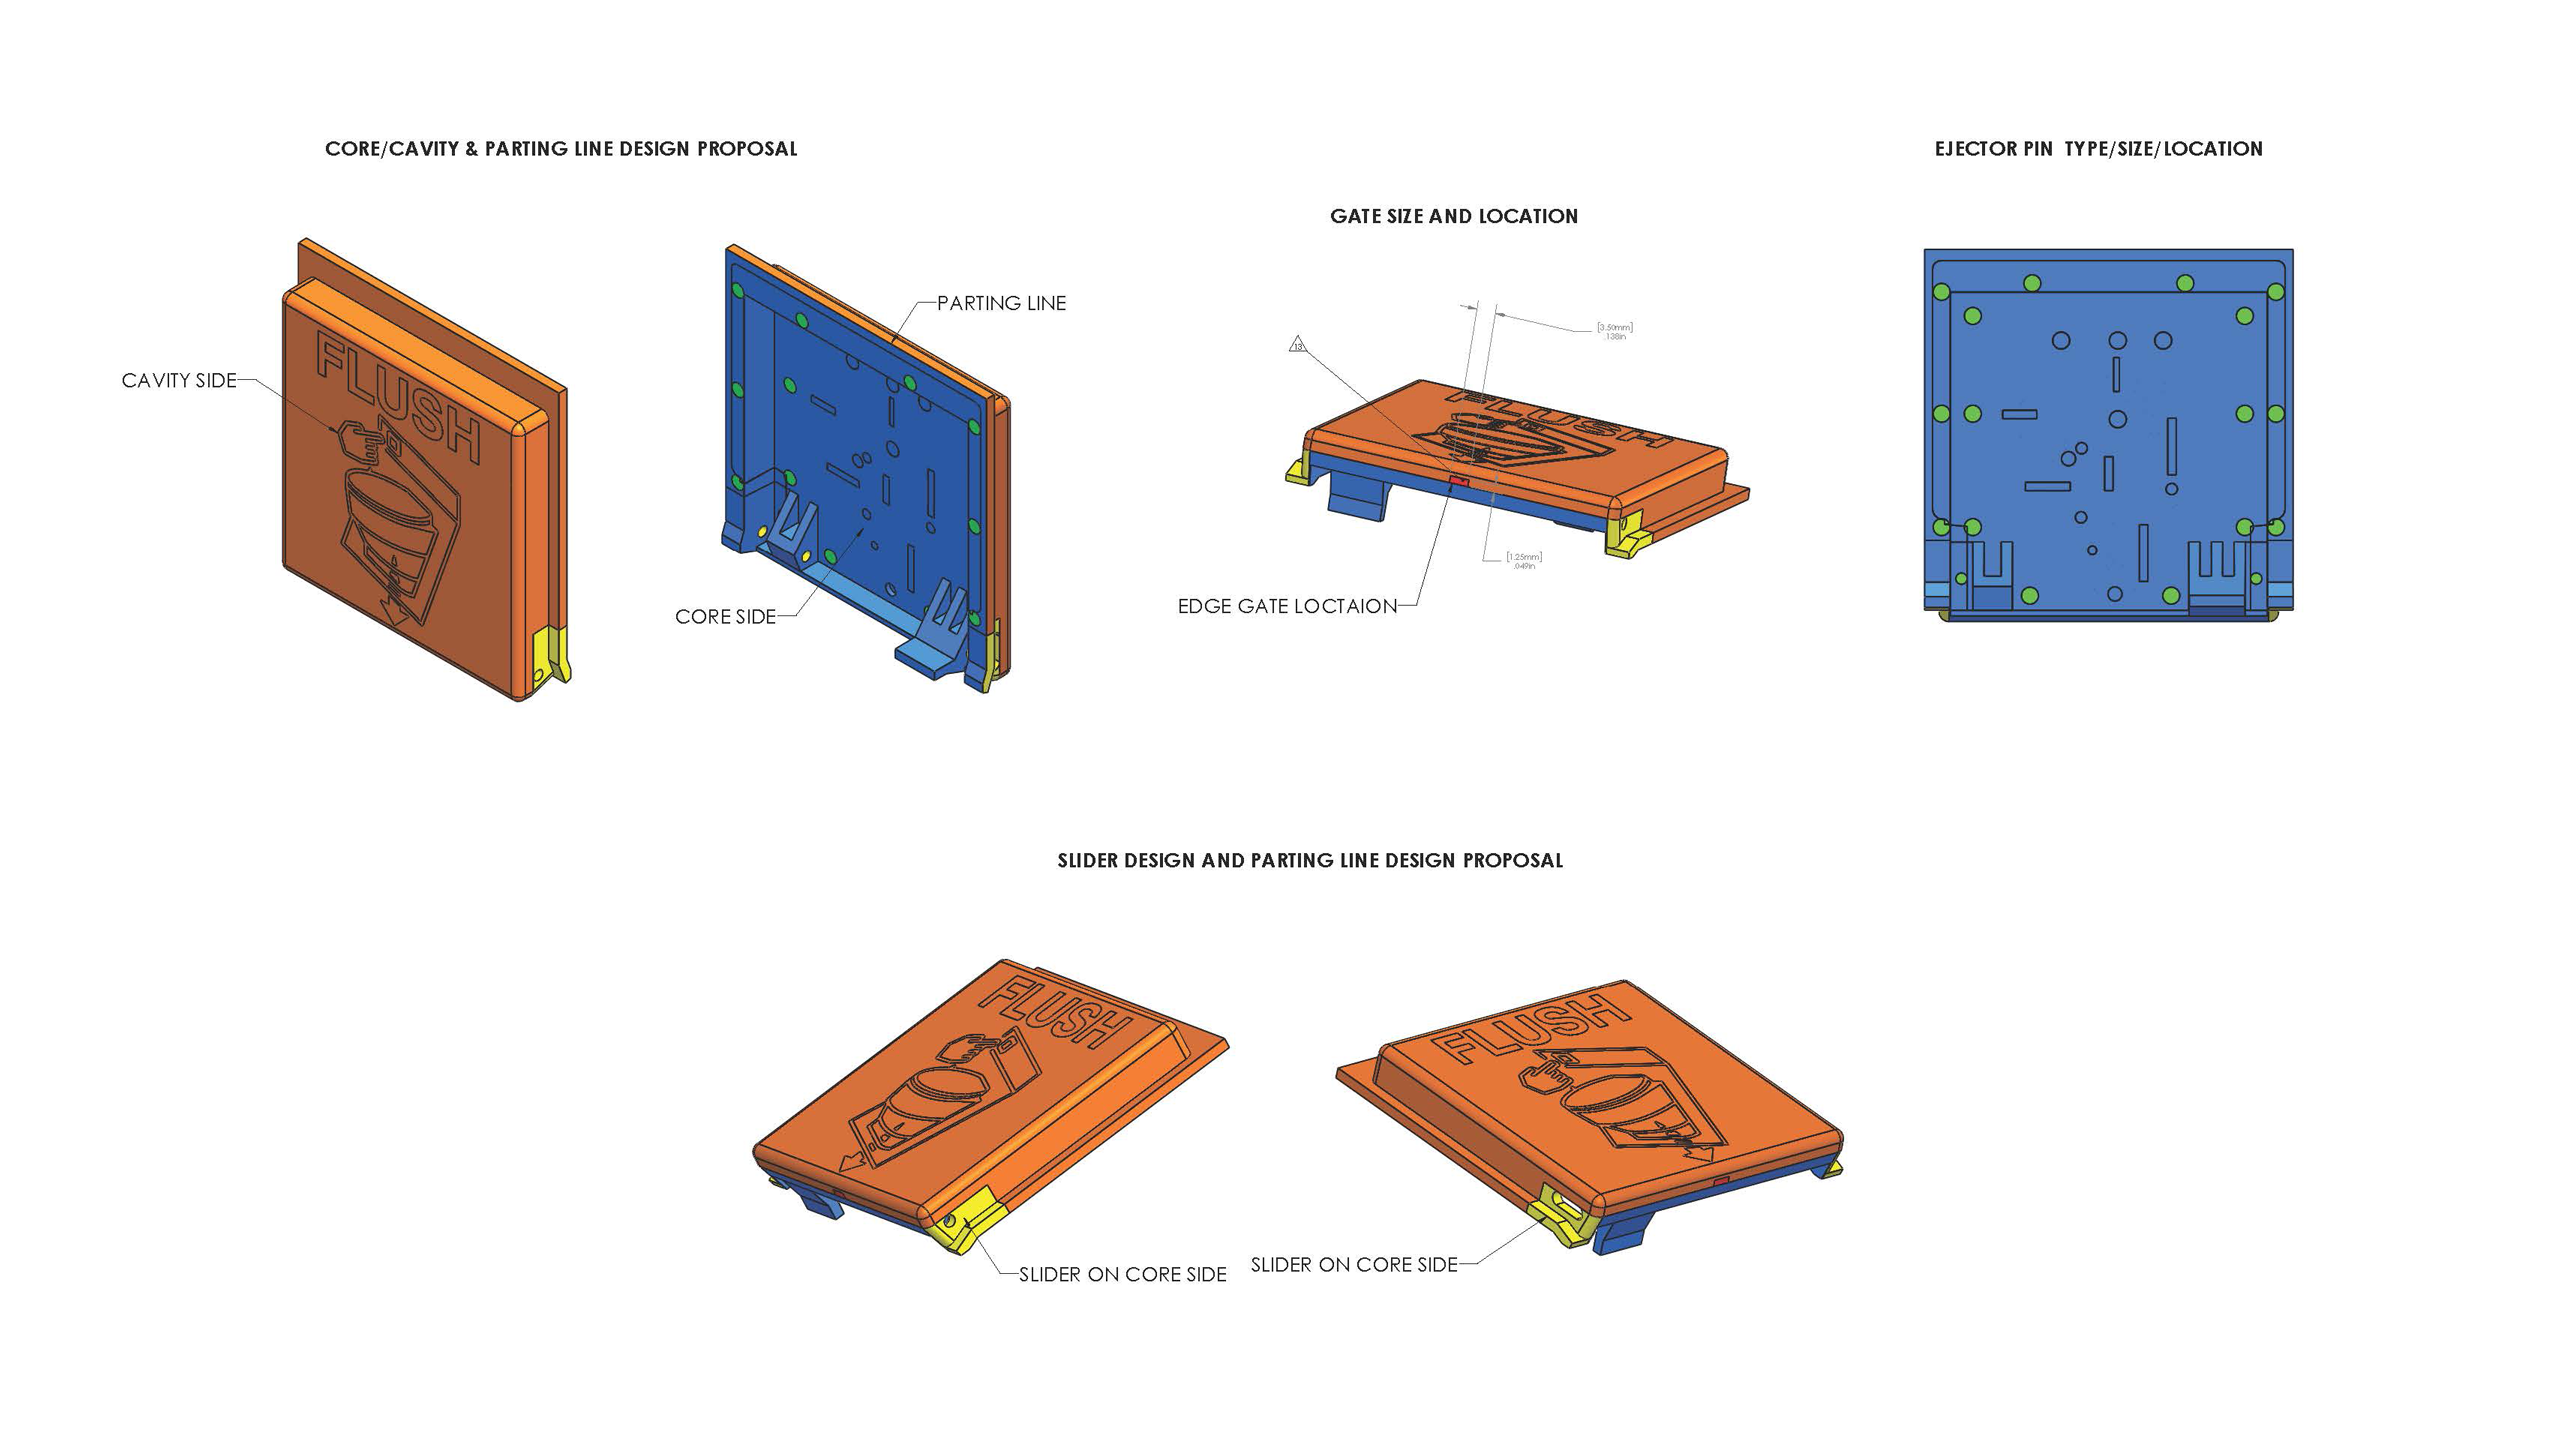
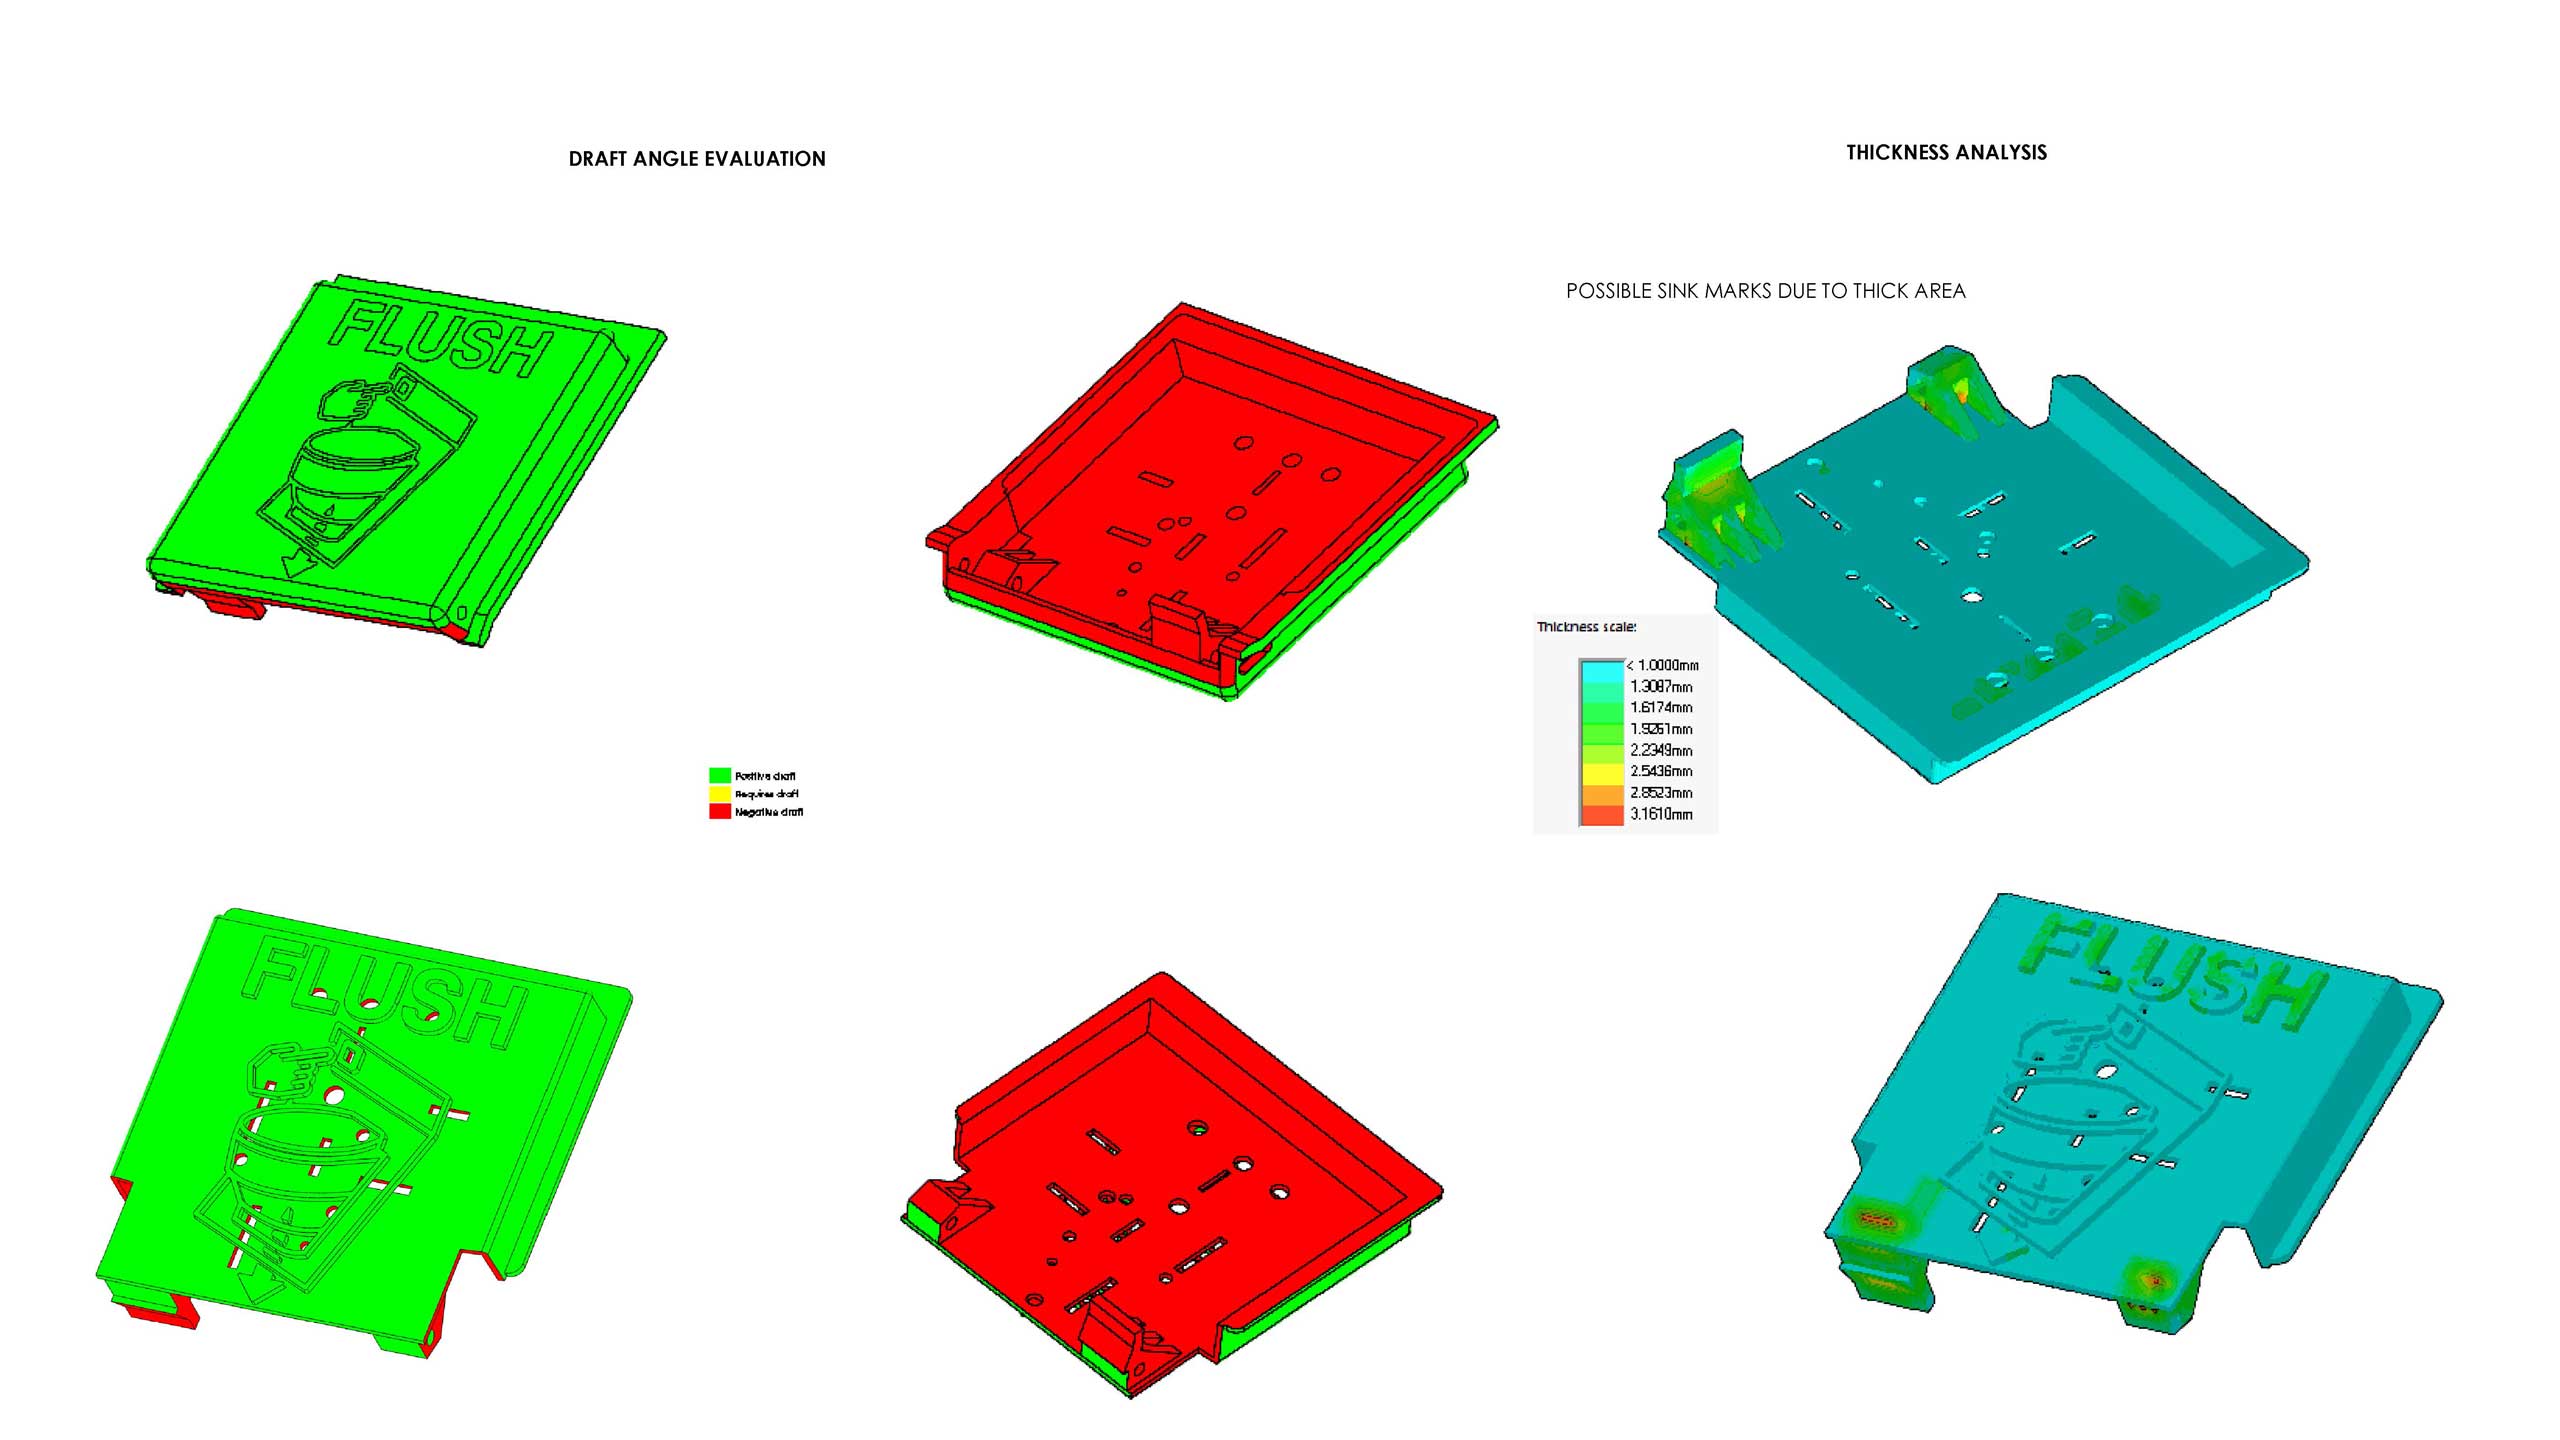
Some things designers often overlook is detailing the CAD model so that it can be manufactured. In this case this is a plastic molded part so design fundamentals for mold injection need to be consider. Such as parting line, identify core and cavity side, surface finish, draft direction and angle, side actions, undercuts, ejector pin locations, tolerances, and uniform wall thickness.
Normally this is not a requirement for the CAD designer but falls more on the side of the tooling designer. However I like to take a hybrid approach because I find that it shows the manufacture that you put some thought into part manufacturability. This means you get very little kickback from the manufacture on design iterations therefore the product can get to market faster for you to capitalize on sales opportunity.
Production
Ready to get started?
Credits
